
Kombucha Second Fermentation: The Complete Guide
First fermentation turns sweet tea into kombucha. Kombucha second fermentation is where you can turn that finished kombucha into something fizzy, flavoured, and a little more your own.
This is the stage where fruit, juice, ginger, herbs, and spices come into play. It’s also where carbonation develops inside the bottle. Once you understand the basic process, second fermentation becomes one of the most enjoyable parts of brewing kombucha because you can start experimenting with flavour combinations and finding out what works best in your own kitchen.
This guide covers the whole process: what’s happening inside the bottle, which bottles to use, how much flavouring to add, how long second fermentation takes, how to improve carbonation, and how to avoid the mistakes that lead to flat kombucha or bottles with far more pressure than you expected.
If you haven’t brewed your first batch yet, start with my complete beginner’s guide to brewing kombucha at home. This guide assumes your first fermentation is finished and you’re ready to bottle.
What Is Kombucha Second Fermentation?
Second fermentation, often called F2, begins once finished kombucha is transferred into a closed bottle. At this stage you can add fruit, juice, ginger, herbs, spices, or another flavouring.
Yeasts already present in kombucha can metabolise available sugars and produce carbon dioxide. In a closed bottle, some of that CO2 dissolves into the liquid under pressure, producing the carbonation we associate with second-fermented kombucha. Kombucha itself is a complex fermentation involving both yeasts and bacteria, and its microbial composition and fermentation behaviour can vary considerably between cultures and conditions (Jayabalan et al., 2014; Villarreal-Soto et al., 2018).
Unlike force-carbonated drinks, the fizz here is created biologically during fermentation. That means carbonation naturally varies from batch to batch depending on factors such as temperature, residual sugar, yeast activity, flavourings, and how well your bottles seal.
That variation is normal. The goal isn’t to make every batch behave identically, but to understand the variables well enough that your results become more predictable over time.
What You Need for Kombucha Second Fermentation
You don’t need much equipment for second fermentation.
Equipment
- Pressure-safe bottles designed for carbonated drinks
- A clean jug for transferring kombucha
- A funnel if it makes filling easier
- A fine mesh strainer for serving
- Labels or masking tape for marking the bottling date
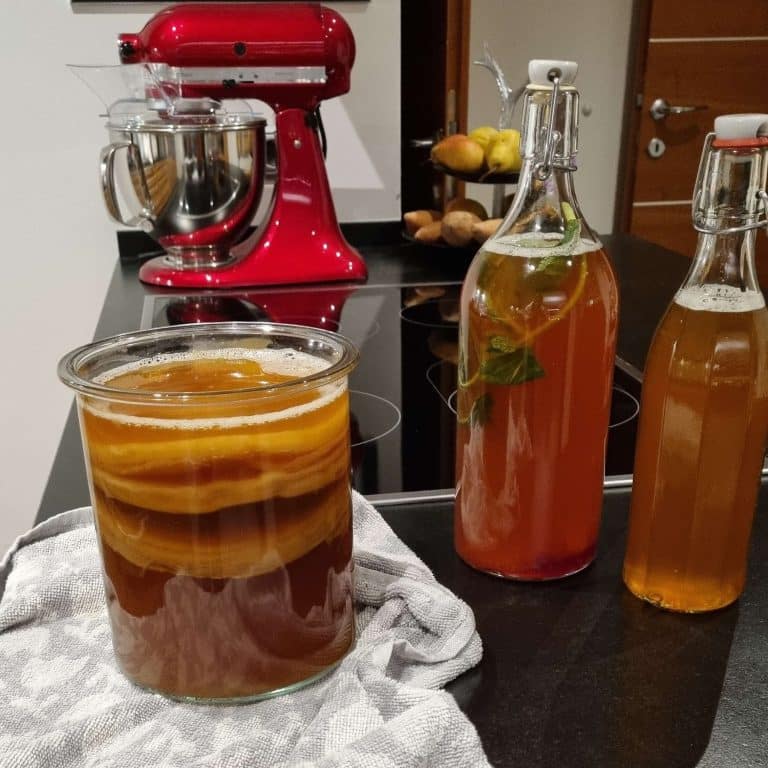
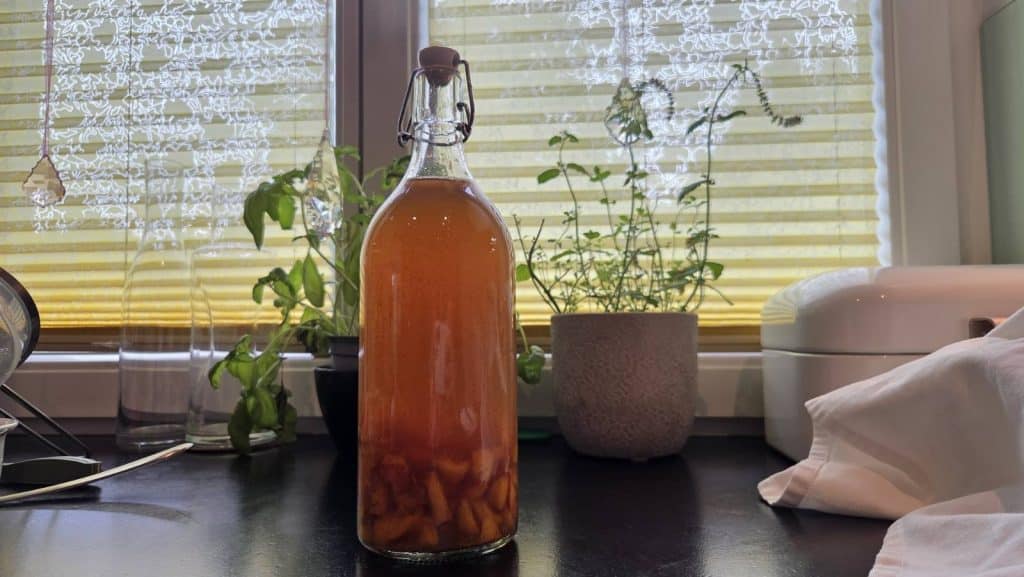
I usually use 500ml or 1L flip-top bottles. Both sizes work well for second fermentation, are easy to seal, and can be reused for many batches as long as the glass, closure, and gasket remain in good condition.
Flavourings
There are plenty of options:
- Fresh fruit, chopped or lightly crushed
- 100% fruit juice
- Fresh ginger
- Fresh herbs such as mint or basil
- Culinary lavender
- Spices such as cinnamon or cardamom
- Dried fruit
You also don’t need to flavour every bottle. If you want plain carbonated kombucha, you can add a small amount of sugar instead.

Blueberries and lavender as flavouring ingredients for kombucha second fermentationDo you need extra sugar?
Not always.
If you’re using sweet fruit or fruit juice, there is often enough fermentable sugar available without adding anything else. Your finished first ferment usually still contains some residual sugar too.
But additional sugar can be useful if your first ferment is already quite dry or if you’re using flavourings that contribute very little sugar, such as ginger, herbs, spices, or a small amount of lemon juice.
As a starting point, around ½ teaspoon of sugar per 500ml bottle is enough when additional sugar is needed.
More sugar can also mean more CO2 production, so don’t treat it as a shortcut to unlimited fizz. Sealed kombucha left at room temperature can continue producing and accumulating carbon dioxide, which is why bottles should be refrigerated once the desired carbonation develops. Colorado State University Extension specifically warns that leaving tightly capped kombucha at room temperature too long can lead to excessive CO2 accumulation.
Choosing the Right Bottles
The bottle is one of the most important pieces of equipment in second fermentation.
You’re deliberately creating carbon dioxide inside a sealed container, so the bottle needs to be designed to withstand pressure.
Flip-top bottles made for carbonated drinks are a good choice. The closure creates a tight seal, and the bottles can be reused for many batches when they remain undamaged.
The important part isn’t simply whether a bottle has a flip top or screw top. It’s whether the bottle and closure are designed for carbonated beverages and can maintain a reliable seal.
Avoid thin decorative glass bottles, old food jars, or other containers that weren’t made to hold carbonated drinks.
Check the bottles before every batch
Inspect the glass for cracks, chips, or other damage. Check flip-top gaskets too. They should still feel flexible and seal evenly against the bottle.
A worn or poorly fitting gasket is a common reason kombucha stays flat because CO2 can escape instead of remaining trapped inside the bottle.
Replace gaskets when they become cracked, hard, misshapen, or unreliable.
How to Harvest Your First Ferment
Before you start bottling, make sure your first ferment is actually ready.
1. Reserve starter for your next batch
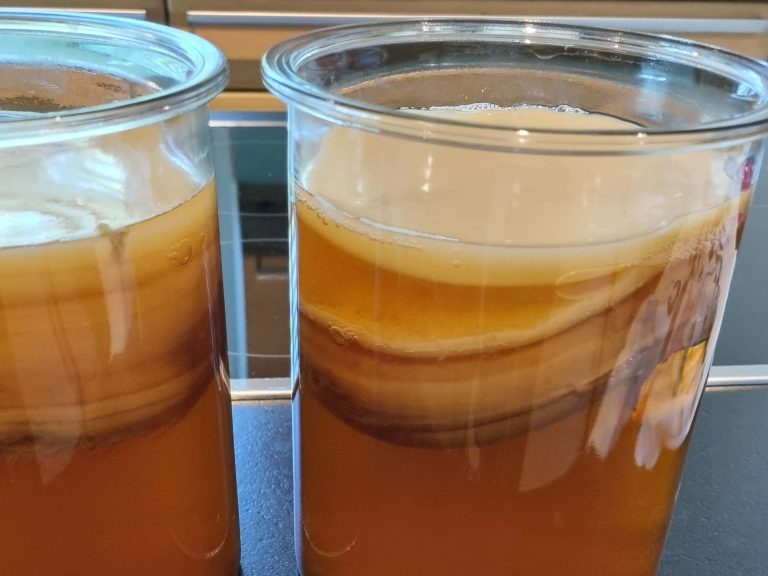
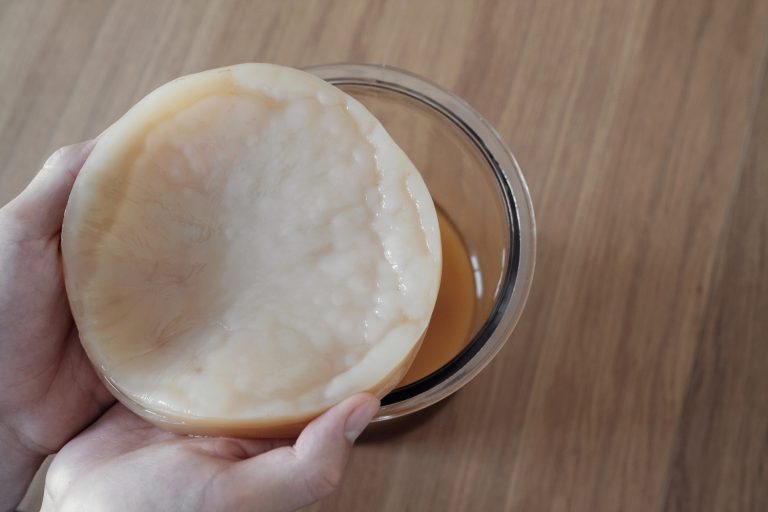
Remove the SCOBY and place it in a clean bowl along with enough finished kombucha to use as starter liquid for your next batch.
The exact amount depends on the size of your brewing batch, but make sure you reserve the starter before flavouring the rest.
2. Taste the kombucha
Your finished first ferment should taste pleasantly tart while still retaining some sweetness.
If it still tastes mostly like sweet tea, give it more time.
If it has become very sour or vinegar-like, it can still be useful as starter liquid, but it may not produce the most balanced second ferment.
If this happens regularly, read my guide to why kombucha tastes like vinegar.
3. Distribute the yeast
Yeast often settles toward the bottom of the brewing vessel, which means bottles filled from different parts of the same batch can sometimes carbonate differently.
Before bottling, gently stir the finished kombucha so the yeast is distributed more evenly. You don’t need to vigorously mix or shake it.
Transfer the kombucha into a clean jug if that makes filling the bottles easier.
Adding Your Flavourings
I prefer to add the flavourings to the bottle first and pour the kombucha over them.
There isn’t one perfect quantity for every fruit or flavour, but these are useful starting points for a 500ml bottle:
| Flavouring | Starting amount |
|---|---|
| Fresh fruit, chopped or crushed | 60–80g |
| Fruit juice | 2–4 tablespoons |
| Fresh ginger, sliced | 2–3cm |
| Fresh herbs | 3–5 leaves |
| Cinnamon | 1 small stick |
| Dried fruit | About 1 tablespoon |
For a 1L bottle, simply double these starting amounts.
Think of these as starting points rather than strict formulas. The sweetness and intensity of fruit varies enormously, and you may prefer stronger or lighter flavours than I do.
For specific combinations and exact ratios, take a look through my kombucha recipes. Ginger lemon, blackberry apple, blueberry lavender, and other combinations all behave a little differently during second fermentation.

Filling and Sealing the Bottles
Add your flavouring, then pour the kombucha into each bottle.
Leave a small amount of headspace at the top, roughly 2–4cm. You don’t need to measure it precisely; just avoid filling the bottle right to the rim.
Close the bottle securely and check that the seal is sitting correctly.
If you added plain sugar, gently turn the sealed bottle a few times to help dissolve it. There’s no need to shake it vigorously.
I also recommend writing the bottling date on each bottle with masking tape. Once you have several flavours or batches going at once, it becomes surprisingly easy to forget which one was bottled when.
Kombucha Second Fermentation Temperature and Timing
Temperature is one of the biggest variables in second fermentation. A warm kitchen usually produces carbonation faster than a cool kitchen because microbial activity changes with temperature.
Around 21–27°C is a useful practical range for second fermentation, but you don’t need to hit an exact number. Scientific reviews also emphasise temperature as one of the important variables influencing kombucha fermentation kinetics and composition (Villarreal-Soto et al., 2018).
As a rough guide:
Above 24°C: Start checking after about 24 hours. Some batches may be ready within 24–48 hours.
21–23°C: Around 2–3 days is common.
Below 20°C: Expect fermentation to take longer, often around 3–5 days.
These are guidelines, not guarantees. The exact timing depends on your kombucha, residual sugar, flavourings, yeast activity, and bottle seal.
A review of kombucha processing describes second fermentation as commonly lasting around 2–3 days in a closed container before refrigeration, but home conditions vary enough that I prefer to use this as a reference point rather than a fixed rule (Miranda et al., 2022).
That’s why learning how your own batches behave is more useful than following a fixed number of days.
Finding a warmer spot
If your kitchen is cool, look for a naturally warmer part of the room rather than trying to heat the bottles aggressively.
Keep them away from direct sunlight and places where the temperature changes dramatically.
Most importantly, don’t simply extend fermentation indefinitely because the kitchen is cold. Check the bottles and refrigerate them once carbonation has developed.
How to Check Kombucha Carbonation
One of the trickier parts of second fermentation is deciding when the kombucha is ready.
If your kitchen is warm, start checking after roughly 24 hours. In a cooler kitchen, you may wait closer to 48 hours.
Rather than opening every bottle every day, I prefer to use one bottle as a test bottle when possible.
Carefully crack the lid open just enough to gauge the pressure. A noticeable hiss tells you CO2 is building.
If there’s almost no pressure, close it again and give the batch more time.
Repeatedly opening bottles releases some of the carbonation you’re trying to build, so there’s no need to fully open and taste every bottle throughout the process.
As you brew more batches, you’ll get better at recognising how quickly kombucha carbonates in your kitchen.
Refrigerating and Serving
Once you’re happy with the carbonation, move the bottles to the refrigerator.
Cold temperatures slow fermentation considerably, but they do not sterilise the kombucha or make its microorganisms disappear. Reviews of kombucha processing specifically note that the bacteria and yeasts can remain viable after refrigeration, which is why cooling is better described as slowing fermentation rather than stopping it completely (Miranda et al., 2022).
Chill the bottles thoroughly before opening them.
When serving, open the bottle slowly and over the sink. Fruit-based second ferments in particular can foam quickly.
Pour through a fine mesh strainer if you want to remove pieces of fruit, ginger, seeds, or yeast strands. The strands themselves are harmless, but many people prefer a clearer drink.
Kombucha is best served cold.
Kombucha Bottle Safety
Second fermentation produces real pressure.
Most of the time that means nothing more dramatic than a satisfying hiss and a nicely carbonated glass of kombucha. But if bottles are left warm for too long, especially when plenty of fermentable sugar is available, the pressure can continue to increase.
Colorado State University Extension recommends tightly capping flavoured kombucha for only a limited room-temperature period before refrigeration and specifically cautions that longer capped fermentation can lead to dangerous CO2 accumulation.
A few habits make second fermentation much safer.
Use bottles designed for carbonation
This is the most important rule.
Use intact bottles specifically made to hold carbonated drinks. Don’t rely on decorative bottles, thin jars, or containers that were never intended to withstand internal pressure.
Inspect the glass and seals
Check bottles for chips and cracks before filling.
If you use flip-top bottles, inspect the gasket too. Replace it when it becomes stiff, damaged, or no longer seals reliably.
Refrigerate when carbonation is ready
Don’t leave a well-carbonated bottle at room temperature for several extra days just because you’re hoping for even more fizz.
CO2 production can continue while the bottle remains warm.
Once the carbonation is where you want it, refrigerate the bottle.
Open cold and slowly
Cold kombucha generally behaves more calmly when opened because more of the carbon dioxide remains dissolved in the liquid.
Open the bottle slowly over the sink and give the pressure time to escape.
If you know a particular batch is very lively, placing a cloth loosely over the top while opening can help contain any spray.
If a bottle seems heavily pressurised
Don’t shake it and don’t open it warm.
Refrigerate it thoroughly first and then open it slowly in the sink. Handle it carefully and avoid unnecessary movement.
One of my mango chilli bottles once ended up on a friend’s ceiling because it wasn’t opened carefully. A cold bottle, opened slowly over the sink, is a much better experience.
Store bottles upright
I store second-fermentation bottles upright. It keeps fruit and sediment toward the bottom and avoids leaving liquid sitting continuously against the closure or gasket.
Troubleshooting Second Fermentation
My kombucha is flat
Flat kombucha can have several causes.
The bottle may not be sealing properly, the kitchen may be too cool, your first ferment may have very little residual sugar left, the flavouring may contribute very little sugar, or that particular bottle may simply have received less yeast.
If your first ferment is already fairly dry and you’re using a low-sugar flavouring, try adding around ½ teaspoon of sugar per 500ml bottle next time.
Also check your bottle seals and consider gently stirring the first ferment before bottling to distribute the yeast more evenly.
For a full troubleshooting guide, read why your kombucha has no fizz.
My kombucha has too much fizz
Very active carbonation usually means the yeast had plenty of fermentable sugar and enough time at a favourable temperature.
Next time, start checking earlier and refrigerate sooner.
If the bottles are already highly carbonated, refrigerate them thoroughly before opening and open slowly over the sink.
My kombucha is cloudy
Cloudiness is usually normal.
Kombucha contains yeasts and other fermentation sediment, and second fermentation can make this more visible. Kombucha itself contains a complex microbial community of yeasts and bacteria, so some visible sediment or haze is not unexpected (Jayabalan et al., 2014).
You can strain the kombucha when pouring if you prefer a clearer drink.
I can barely taste the fruit
Fruit flavour depends heavily on ripeness, quantity, and the ingredient itself.
Try using riper fruit, increasing the amount slightly, lightly crushing the fruit before bottling, or allowing enough time for the flavour to infuse before refrigerating.
Some fruits are simply much more assertive than others.
My second ferment tastes too sour
Your first ferment may already have been quite acidic before bottling, or the second ferment may have continued longer than you prefer.
Taste the first ferment before bottling and refrigerate the second ferment once you have the balance of flavour and carbonation you want.
How Second Fermentation Changes the Flavour
Second fermentation does more than add bubbles.
Fruit, herbs, ginger, and spices have time to infuse into the kombucha while the bottle sits at room temperature. At the same time, yeasts and bacteria continue metabolising available substrates, so fermentation continues to alter the chemical and sensory profile of the drink (Villarreal-Soto et al., 2018).
Carbonation also changes the way a drink feels and tastes. A fizzy kombucha often seems brighter, fresher, and slightly sharper than the same kombucha without carbonation.
This is one reason second-fermented kombucha can taste dramatically different from the first ferment straight from the brewing jar.
Building Your Own Second Fermentation Routine
There’s no universal schedule that works perfectly for every kitchen.
Instead of deciding that first fermentation must always finish on day nine and second fermentation must always last exactly 48 hours, use taste and temperature as your guides.
A simple routine might look like this: taste your first ferment as it approaches readiness, bottle when the sweet-tart balance tastes right, and then start checking the second ferment after roughly 24–48 hours depending on your kitchen temperature.
The most useful thing you can do is keep notes.
Write down:
- The flavouring and amount
- Whether you added extra sugar
- Approximate room temperature
- How long the second fermentation lasted
- How much carbonation you got
- What you would change next time
After a few batches, you’ll start seeing patterns specific to your setup.
That information is much more useful than trying to copy someone else’s fermentation schedule exactly.
Kombucha Second Fermentation FAQ
How long does kombucha second fermentation take?
Around 2–4 days is common, but temperature makes a big difference. In a warm kitchen above 24°C, start checking after about 24 hours. Around 21–23°C, 2–3 days is common. Below 20°C, it may take 3–5 days or longer.
Treat those numbers as starting points rather than fixed rules.
Do I need to add sugar for second fermentation?
Not always.
Sweet fruit and fruit juice often provide enough additional fermentable sugar, and your finished kombucha may still contain residual sugar from the first fermentation.
If you’re using low-sugar flavourings such as ginger, herbs, spices, or a small amount of lemon juice — or if your first ferment is already quite dry — around ½ teaspoon of sugar per 500ml bottle can help encourage carbonation.
Can I second ferment kombucha without flavouring?
Yes.
If you want plain carbonated kombucha, add around ½ teaspoon of sugar per 500ml bottle instead of fruit or juice and ferment it in the same way.
Why did my kombucha overflow when I opened it?
The bottle may be highly carbonated, but fruit pulp, sediment, shaking, and opening the kombucha warm can also make foaming much more dramatic.
Chill the bottle thoroughly, don’t shake it, and open it slowly over the sink.
If this happens regularly, shorten your second fermentation time or refrigerate the bottles sooner.
Start Experimenting
Second fermentation is where kombucha brewing becomes much more personal.
Once you understand the relationship between sugar, yeast, temperature, time, and bottle pressure, you can start treating recipes as starting points rather than rigid formulas.
Keep notes, change one thing at a time, and pay attention to what happens in your own kitchen. After a few batches, you’ll have a much better sense of how long your bottles need and which flavour combinations you enjoy most.
Struggling with carbonation? Read my detailed guide to why kombucha has no fizz and how to fix it.
Ready to try a simple flavour combination? My ginger lemon kombucha is refreshing, uncomplicated, and made with ingredients I usually have on hand.
For something more seasonal, try my blueberry lavender kombucha.
New to kombucha altogether? Start with my complete beginner’s guide to brewing kombucha at home.
Sources
Jayabalan, R., Malbaša, R. V., Lončar, E. S., Vitas, J. S., & Sathishkumar, M. (2014). A review on kombucha tea—microbiology, composition, fermentation, beneficial effects, toxicity, and tea fungus. Comprehensive Reviews in Food Science and Food Safety, 13(4), 538–550. https://doi.org/10.1111/1541-4337.12073.
Villarreal-Soto, S. A., Beaufort, S., Bouajila, J., Souchard, J.-P., & Taillandier, P. (2018). Understanding kombucha tea fermentation: A review. Journal of Food Science, 83(3), 580–588. https://doi.org/10.1111/1750-3841.14068.
Miranda, J. F., et al. (2022). Kombucha: A review of substrates, regulations, composition, and biological properties. Journal of Food Science. https://doi.org/10.1111/1750-3841.16029.
Colorado State University Extension. Understanding and Making Kombucha. Reviewed October 2025. Used here primarily for practical guidance on room-temperature bottle conditioning, refrigeration, and CO2-pressure precautions.