
How to Brew Kombucha at Home for Beginners (And What to Do When It Goes Wrong)
So you want to brew your own kombucha at home.
Maybe you’ve been buying it at €4 a bottle and quietly doing the maths. Maybe a friend handed you a SCOBY in a jar, and you have no idea what to do with it. Maybe you’ve just always been curious about how fermentation actually works.
I’ve been brewing kombucha at home for some years now. My first batch got mouldy. My second tasted like vinegar. Somewhere around batch four, I figured out what I was doing, and I haven’t bought a bottle since (okay, I have bought a few).
This guide covers everything: what kombucha is, what equipment you actually need, how to brew your first batch step by step, how to look after your SCOBY, second fermentation, building a SCOBY hotel, and what to do when things go wrong. Bookmark it and come back to it.
1. What Is Kombucha?
Kombucha is fermented sweet tea. That’s the whole thing.
You brew strong, sweetened tea, add a live culture and some already-fermented kombucha, and leave it at room temperature from seven days to two weeks. The bacteria and yeast in the culture consume most of the sugar and produce organic acids, primarily acetic and gluconic acid, which give kombucha its tangy taste and gentle fizz (Jayabalan et al., 2014).
The result is low in residual sugar, contains live bacteria, and costs a fraction of shop-bought kombucha to make at home.
Does kombucha contain alcohol?
Yes, in small amounts. Most home brews sit between 0.5% and 1.5% ABV, similar to a very ripe fruit juice. Longer fermentation or a vigorous second ferment can push this slightly higher.
Does it actually have health benefits?
Honestly, the research is promising but still catching up with the hype. We know kombucha contains live bacteria, organic acids, and antioxidants from the tea. A 2019 systematic review found some evidence for health benefits but noted the human studies are limited (Kapp & Sumner, 2019). Brew it because you enjoy it. Anything else is a bonus.
2. What Is a SCOBY and Where Do You Get One?
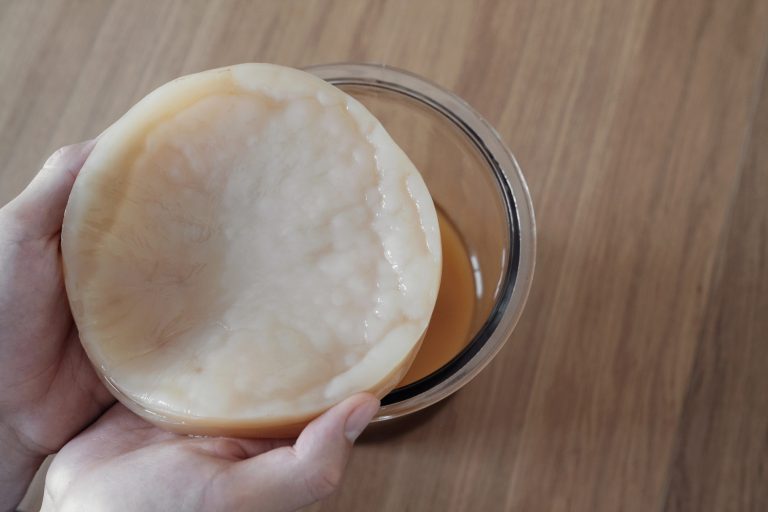
SCOBY stands for Symbiotic Culture of Bacteria and Yeast. It looks like a pale, rubbery disc somewhere between a thick pancake and a jellyfish, and it floats on the surface of your brew. Research has shown it contains a complex community of bacteria and yeast working together to drive fermentation (Villarreal-Soto et al., 2018)
Alongside the SCOBY, you need starter liquid, which is already-fermented kombucha. The starter liquid acidifies the sweet tea immediately, which stops unwanted bacteria from taking hold before your culture gets going. The two work as a pair. Never start a batch with one but not the other.
Read my full guide on what a SCOBY is and how to look after it.
Where to get a SCOBY
From a friend or fellow brewer. SCOBYs grow a new layer with every batch, so anyone who brews regularly has extras. Ask around before spending money, the kombucha community gives them away constantly. That’s how I got my first scoby.
From an online seller. Many small producers sell SCOBYs online, usually packed in starter liquid. Make sure yours comes with at least 100ml of liquid.
From a health food shop. Some specialist shops stock live SCOBYs. Call ahead before making a trip.
Grown from a shop-bought bottle. Buy a raw, unflavoured, unpasteurised bottle of kombucha. Pour it into a clean jar, cover with a cloth, and leave it at room temperature for two to four weeks. A thin SCOBY will form on the surface. It takes a few batches to build strength, but it works. A good sign of the bought bottle is a small scoby swimming at the top already!
3. What Equipment Do You Need?
Less than you think. Seriously, don’t let anyone sell you a starter kit before you’ve read this.
The essentials
A large glass jar. A 1–2 litre wide-mouth jar works well for a first batch. Wide-mouth matters because it gives your SCOBY room to grow and allows good airflow. Mason jars and clip-top preserving jars are both fine. Skip plastic (it harbours bacteria and absorbs odours over time) and anything metal (it reacts with the acidic brew).
A breathable cover. The jar needs to breathe during fermentation, but it also needs protecting from dust and fruit flies. A tightly woven cloth, a coffee filter, or a couple of layers of kitchen paper all do the job. Hold it in place with a rubber band.
A large pot. For brewing the sweet tea. Any kitchen pot works.
A wooden or plastic spoon. For stirring. Metal spoons can react with acidic liquid over time, so get into the habit of avoiding them.
Your SCOBY and starter liquid. Minimum 100ml of starter liquid, ideally closer to 200ml. More is always better at the start.
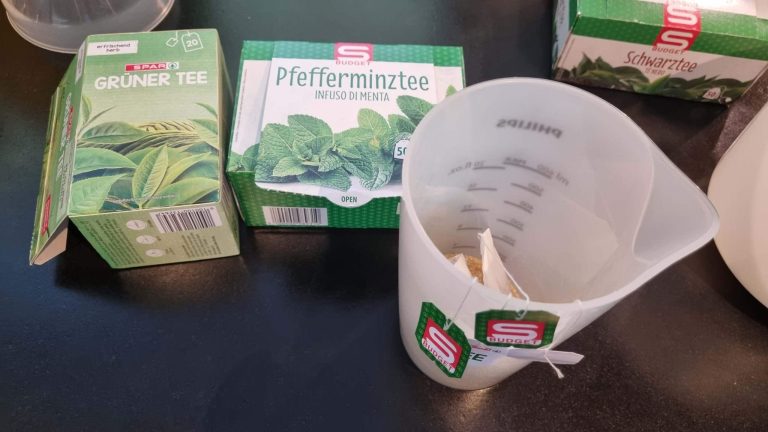
Black or green tea. Plain, unflavoured tea bags or loose leaf. Black tea is the most reliable choice for beginners, the nitrogen content supports the culture. Green tea works too, but produces a lighter, more delicate brew. Avoid anything with added oils or flavourings, including most herbal teas. These can damage the SCOBY (Crum & LaGory, 2016).
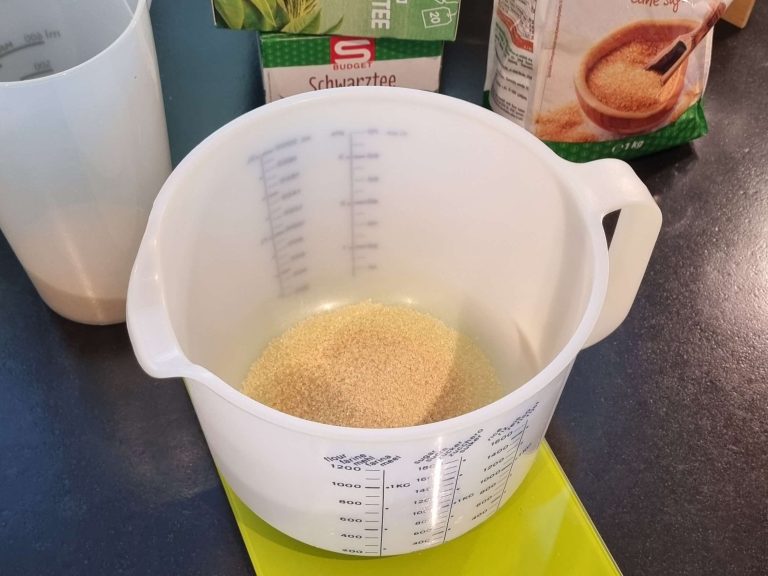
White sugar. Plain granulated, nothing fancy. The SCOBY’s bacteria and yeast are well adapted to processing sucrose. Honey has natural antibacterial properties that can interfere with the culture, particularly raw honey. Coconut sugar and other alternatives ferment unpredictably. Start with white sugar and experiment later once you have a few batches under your belt.
Filtered or dechlorinated water. Chlorine in tap water inhibits the bacteria in your SCOBY. Either filter your tap water or leave it uncovered overnight before using it.
Helpful but not essential
A thermometer. Useful for confirming your tea has cooled before you add the SCOBY, and for keeping an eye on your fermentation environment.
Glass bottles with airtight lids. You’ll want these for second fermentation. Flip-top bottles (Grolsch-style) are ideal.
pH strips. Finished kombucha should sit between pH 2.5 and 3.5 (Jayabalan et al., 2014). Strips are reassuring for beginners but not strictly necessary.
Read my full equipment guide for exactly what to buy and what to skip — coming soon.
4. How to Brew Your First Batch — Step by Step
What you’ll need for a 1-litre batch
- 700ml filtered water
- 2–3 black tea bags (or 1.5 tsp loose leaf)
- 60–80g white sugar
- 1 SCOBY
- 100–200ml starter liquid
Step 1 — Brew the sweet tea
Boil 500ml of your water. Take it off the heat, add the tea bags, and steep for five to seven minutes. Don’t squeeze the bags when you remove them. That releases bitter tannins and affects the final flavour.
Add the sugar while the tea is still hot and stir until every grain has dissolved. Then pour in the remaining cold water. This brings the temperature down faster. Leave the tea to cool completely to room temperature before you do anything else! Usually this takes one to two hours, or faster if you sit the pot in a sink of cold water.
This step genuinely matters. Introducing a SCOBY to liquid above 30°C can damage or kill the culture. If you have a thermometer, aim for below 25°C. When in doubt, wait another half hour.
Step 2 — Prepare your jar
Rinse the jar thoroughly with hot water. If you use soap, rinse extremely well! Any residue can harm the SCOBY. A rinse with plain white wine vinegar is a good natural option. Leave it to air dry.
Step 3 — Add the starter liquid
Pour the starter liquid into the jar first. This is the step most beginners underestimate. The acidity of the starter liquid immediately creates a protective environment in the jar, and without it your batch is vulnerable in those early days. 100ml is the minimum; 200ml is better.
Step 4 — Add the cooled sweet tea
Once the tea is completely cool, pour it in on top of the starter liquid. Leave five to eight centimetres of space at the top, the liquid expands slightly as fermentation begins, and the SCOBY needs room.
Step 5 — Add the SCOBY
Wash your hands, then gently place the SCOBY on top of the liquid. It might float, sink, or sit at an angle. All of these are fine. Don’t prod it or try to position it, just let it settle on its own.
Step 6 — Cover and label
Secure your cloth cover firmly with a rubber band. Fruit flies are attracted to the sweet smell and will ruin a batch if they get in. Write the date on a piece of masking tape and stick it on the jar. You’ll be glad you did when you can’t remember whether it’s been seven days or ten. Sometimes I’m too lazy for this step, but I almost always regret it.
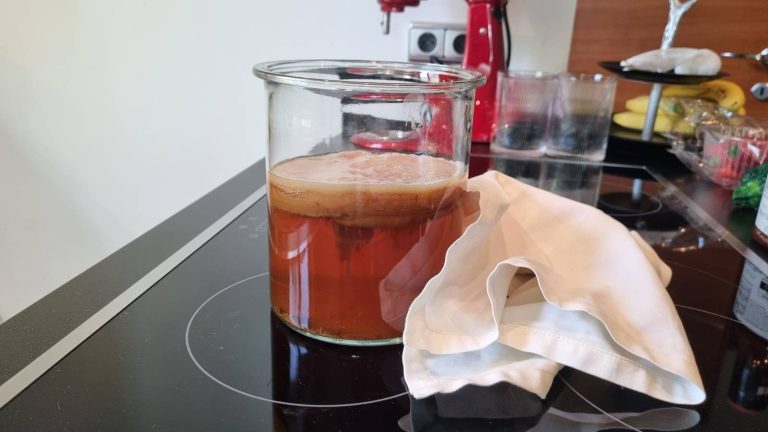
Step 7 — Find it a home
Somewhere warm is what you’re after. Between 21°C and 27°C. A kitchen counter, a shelf near the oven, or a warm cupboard all work. Keep it away from direct sunlight and strong-smelling foods. Kombucha can absorb odours through its breathable cover, which makes for some unpleasant surprises. I keep my brew in a corner of the kitchen, that’s why it’s the fermentation corner;).
Don’t put it in the fridge. The cold slows fermentation to almost nothing.
Step 8 — Taste it regularly from day 7
Leave it alone for the first week. From day seven, taste it regularly by sliding a clean straw under the SCOBY and taking a small sip. You’re looking for a balance of tangy and lightly sweet, a bit like a tart apple juice with more complexity.
In summer, when my kitchen sits above 25°C, five days is often enough. Temperature is the biggest variable. Warmer rooms ferment faster, so taste from day five in summer and day seven in cooler months
Too sweet? Leave it another two or three days. Too sour? You’ve gone a bit far, bottle it and shorten the time next batch. The right point is entirely personal. Trust your palate. There are some hacks for saving a too sour batch, more on that in a future post.
Step 9 — Harvest
When it tastes right, remove the SCOBY with clean hands and place it in a bowl with around 200ml of the finished kombucha. This is your starter liquid for the next batch. Pour the rest into bottles or a jug. Start your next batch immediately if you can, the SCOBY is ready to go again straight away.
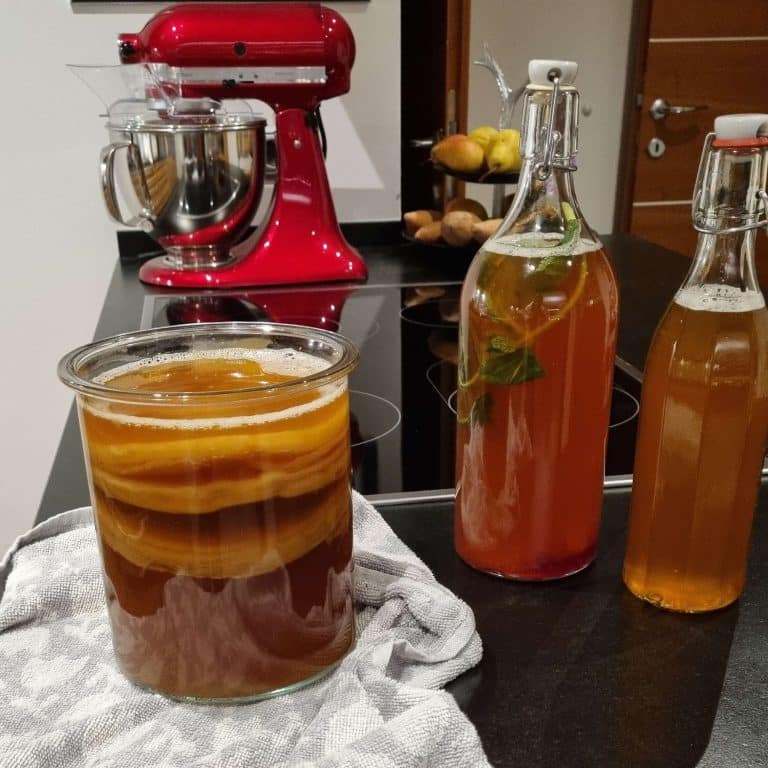
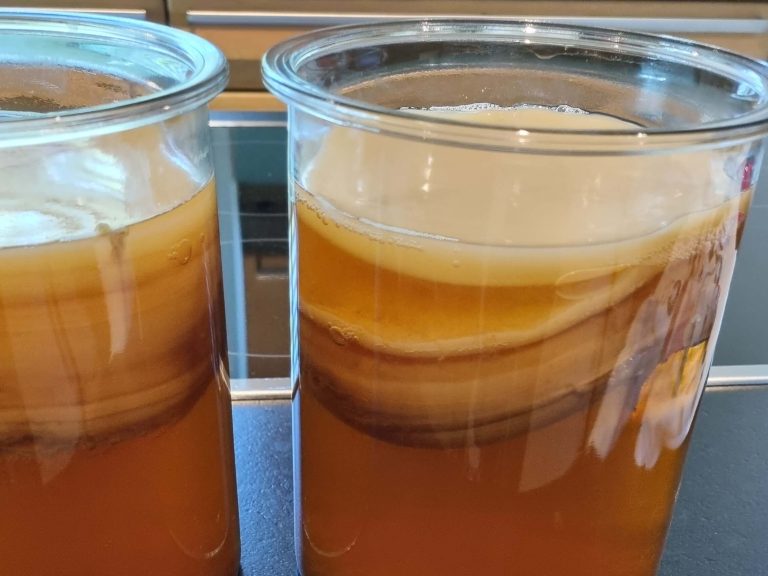
5. What to Expect During Fermentation
A new SCOBY forming on top. Within a few days you’ll notice a thin, transparent layer forming on the surface. This is a new SCOBY growing. By the end of fermentation it may be five to ten millimetres thick. It’s a sign everything is working.
Brown stringy bits in the liquid. These are yeast strands (Marsh et al., 2014). They look alarming if you don’t know what they are, but they’re completely harmless. Strain them out when bottling if you’d rather not see them.
Bubbles. Small bubbles clinging to the SCOBY or rising through the liquid, especially in the first few days. This is CO2 from the yeast. Good sign.
A sharp, vinegary smell. Normal. Your kitchen might smell like a mild vinegar factory for a couple of weeks. Different from a normal kitchen smell, but not unpleasant once you know what it is. But the people around you might hate you for it😬.
The SCOBY looking odd. SCOBYs are not attractive. They grow unevenly, develop brown patches, get holes in them, and generally look like something from a science fiction film. Unless you see fuzzy mould growing on the top surface, green, black, or pink fuzzy growth, the appearance alone is not a problem.
When to be concerned
Fuzzy mould on the top surface of the SCOBY (not underneath, where yeast strands are normal) means the batch needs to be discarded. This is rare if you used enough starter liquid. A smell like rotten food rather than sharp vinegar is also a bad sign. Trust your instincts, properly fermenting kombucha smells sharp and slightly sweet, not wrong.
6. How to Care for Your SCOBY
Keep it fed. A SCOBY that isn’t actively brewing will slowly weaken. If you’re taking a break from brewing, store it in a clean jar submerged in starter liquid. Room temperature is fine for up to two weeks. For longer breaks, the fridge slows everything down enough to keep it viable for a month or two.
Avoid metal. Use clean hands or wooden and plastic tools whenever you handle the SCOBY. This is worth making a habit of early on.
Use filtered water. As mentioned above, chlorine is the enemy.
Keep it warm. Below 18°C and fermentation slows dramatically. Above 30°C, you risk damaging the culture and creating conditions for unwanted bacteria. The sweet spot is 21–27°C.
Peel older layers when it gets thick. After several batches your SCOBY will become a thick stack of layers fused together. Peel off the oldest, darkest layers from the bottom and compost them. Keep the top two or three layers, which are the most active.
Read my full SCOBY care guide — coming soon.
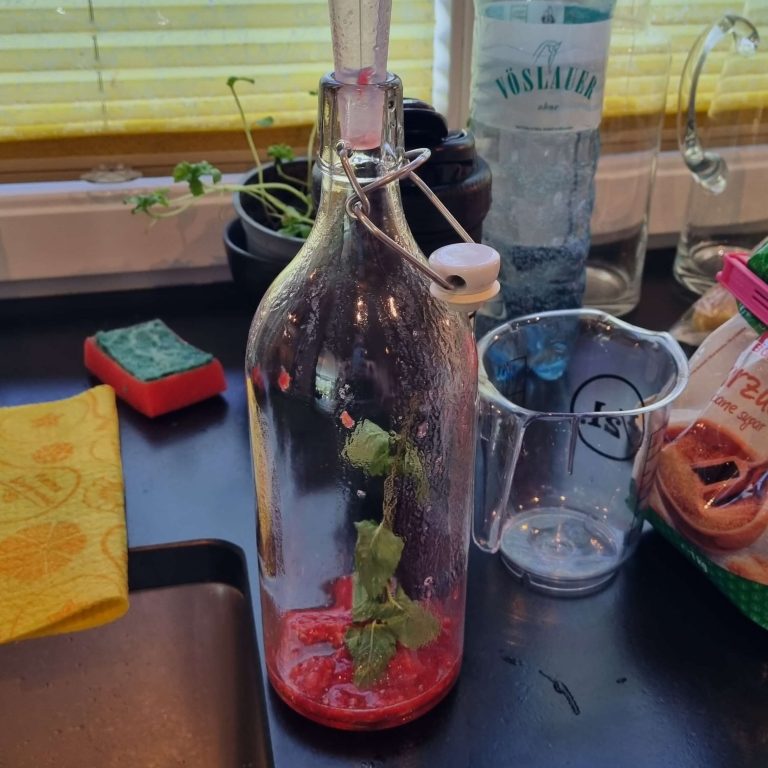
7. Second Fermentation — How to Get Flavour and Fizz
First fermentation gives you kombucha that’s lightly tangy and mildly fizzy. Second fermentation is where it gets interesting.
How it works
After removing the SCOBY and bottling your kombucha, you add a small amount of sugar (fruit juice, fresh fruit, ginger,…) and seal the bottles. The residual yeast feeds on this new sugar and produces CO2. Because the bottles are sealed, the CO2 dissolves into the liquid rather than escaping. The result is proper carbonation.
Basic method
- Pour your finished first ferment kombucha into clean, sealable glass bottles. Leave three to four centimetres of space at the top.
- Add your flavouring. One to two tablespoons of fruit juice, a few pieces of fresh fruit, or a thumb of fresh ginger per 500ml bottle.
- Seal tightly.
- Leave at room temperature for two to four days. From day two, open the bottle carefully over a sink once a day to check carbonation. A strong hiss means it’s working.
- When it’s fizzy enough, move the bottles to the fridge to stop fermentation.
- Open cold, over a sink, carefully. Carbonated kombucha can be enthusiastic.
Flavour combinations worth trying
- Fresh ginger and lemon juice
- Blueberry and lavender
- Mango and chilli
- Raspberry and mint
- Apple and cinnamon
- Passionfruit and orange
Read my full second fermentation guide and flavour combination posts — coming soon.
8. How to Build a SCOBY Hotel
After a few batches, you’ll have more SCOBY than you know what to do with. A SCOBY hotel is a large jar where you store the extras in starter liquid, a backup and a way to share with friends who want to start brewing.
Layer your spare SCOBYs into a clean jar and cover completely with starter liquid or finished kombucha. Cover with cloth, secure with a rubber band, and store at room temperature or in the fridge. Top it up every few weeks with sweet tea or finished kombucha. Remove and compost the oldest, darkest layers every month or so.
A healthy hotel means you always have a backup if a batch goes wrong, and you’ll have SCOBYs to give away indefinitely.
Full SCOBY hotel guide — coming soon.
9. Troubleshooting Your First Batch
It’s too sweet. Needs more time. Leave it two to three more days and taste again.
It tastes like vinegar. Over-fermented, but still safe. Use it as starter liquid for your next batch, or in salad dressings. Reduce the fermentation time by two to three days next batch.
No new SCOBY is forming. Check the temperature, too cold slows everything down. Also check that you used enough starter liquid. Give it up to a week before worrying.
Brown stringy bits everywhere. Yeast strands. Normal and harmless. Strain them out if you prefer a cleaner result.
The SCOBY sank. Normal. A new one will form on the surface regardless.
No fizz after second fermentation. Check the bottle seal first. The room also needs to be above 20°C for carbonation to work. Add a touch more sugar or juice and leave another day or two.
Mould on the top of the SCOBY. Discard the entire batch. Sterilise your jar thoroughly, get fresh starter liquid, and start again. Next time use more starter liquid and make sure everything is very clean before you start.
Full troubleshooting guide — coming soon.
10. Frequently Asked Questions
How long does kombucha keep in the fridge?
Properly fermented kombucha keeps for one to three months in the fridge. It continues fermenting slowly even when cold, so it becomes more sour over time.
Can I use flavoured or herbal tea?
Not for your first batch. Many herbal teas and flavoured teas contain oils or additives that can harm the SCOBY. Once your culture is established you can experiment with additions, but always use a base of plain black or green tea.
Can I use honey instead of sugar?
Raw honey has natural antibacterial properties that can damage the culture. Stick with white sugar for first fermentation. You can add honey as a flavouring in second fermentation once the SCOBY has been removed.
How much should I drink?
Start with a small glass (around 120–180ml) per day. Some people experience digestive changes when they start drinking kombucha regularly, this usually settles after a week or two.
Can I brew without a SCOBY?
You can grow one from a raw, unpasteurised bottle of shop-bought kombucha, but you can’t skip the live culture entirely. The SCOBY and starter liquid are what turn sweet tea into kombucha.
My SCOBY looks terrible. Is it okay?
Almost certainly yes. SCOBYs are naturally lumpy, uneven, and not at all photogenic. Brown patches, holes, and irregular growth are all normal. The only thing to look for is fuzzy mould on the top surface — that’s the one sign that something is actually wrong.
You’re Ready to Brew
That’s everything you need for your first batch.
It won’t be perfect. Mine wasn’t either. But it will teach you more than any guide can, and by the third or fourth batch you’ll have found your timing and your preferred flavour.
Start simple. Black tea, white sugar, enough starter liquid, somewhere warm. Taste it from day seven. Everything else you’ll figure out as you go.
If something looks odd or you’re not sure what’s happening in your jar, drop a comment below or send me a message. I’ve almost certainly made the same mistake and can help you figure it out.
Now go brew something.
Found this useful? Save it to Pinterest and share it with anyone who’s been thinking about home brewing.
Sources
- Jayabalan, R., Malbaša, R. V., Lončar, E. S., Vitas, J. S., & Sathishkumar, M. (2014). A review on kombucha tea — microbiology, composition, fermentation, beneficial effects, toxicity, and tea fungus. Comprehensive Reviews in Food Science and Food Safety, 13(4), 538–550. https://doi.org/10.1111/1541-4337.12072
- Kapp, J. M., & Sumner, W. (2019). Kombucha: a systematic review of the empirical evidence of human health benefit. Annals of Epidemiology, 30, 66–70. https://doi.org/10.1016/j.annepidem.2018.11.001
- Marsh, A. J., O’Sullivan, O., Hill, C., Ross, R. P., & Cotter, P. D. (2014). Sequence-based analysis of the bacterial and fungal compositions of multiple kombucha (tea fungus) samples. Food Microbiology, 38, 171–178. https://doi.org/10.1016/j.fm.2013.09.003
- Villarreal-Soto, S. A., Beaufort, S., Bouajila, J., Souchard, J. P., & Taillandier, P. (2018). Understanding kombucha tea fermentation: a review. Journal of Food Science, 83(3), 580–588. https://doi.org/10.1111/1750-3841.14068
- Crum, H., & LaGory, A. (2016). The big book of kombucha. Storey Publishing.